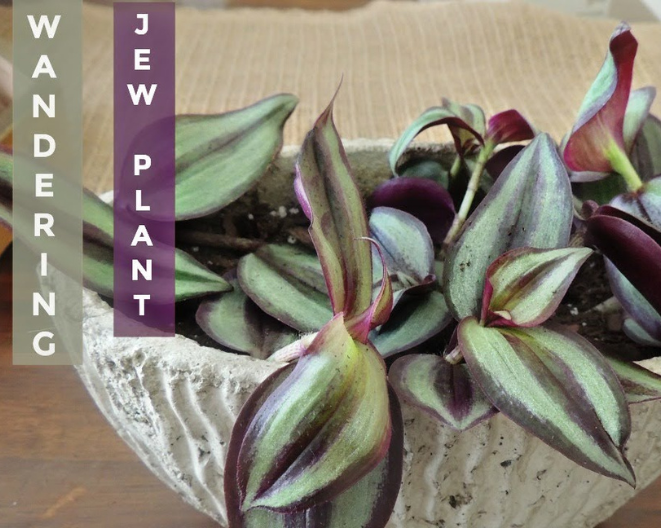
The Wandering Jew plant, or Tradescantia, is a popular houseplant recognized for its colorful leaves and low-maintenance requirements. This plant stands out in any collection because of its beautiful green, purple, and silver foliage. But did you know it is also quite easy to spread? With a few cuttings, you can quickly develop more plants! Here’s a straightforward method of growing Wandering Jew plants from cuttings, complete with tips and tactics to help your plants thrive.
Why Should Wandering Jew Plants Be Propagated?
A great way to expand your collection, share with friends, or just experience the delight of raising a new life from a tiny cutting is to propagate Wandering Jew plants. These plants are ideal for propagation initiatives because of their rapid growth. Additionally, they are resilient and understanding, making them ideal for novices wishing to experiment with propagation.
What You’ll Need to Propagate
Here are a few basic supplies you’ll need to get started:
- A healthy Wandering Jew plant
- Sharp scissors or pruning shears
- Small containers or jars
- Fresh, room-temperature water
- Potting soil (if planting directly)
Step 1: Selecting Healthy Cuttings
Begin by selecting a healthy portion of the plant. Look for stems with brilliant leaves that show no indications of sickness or injury. Ideally, you’ll want a cutting that’s 4 to 6 inches long and has at least two or three nodes.
- Locate the stem node: Determine where the leaves connect to the stem—these are the nodes, which are necessary for future root development.
- Make a clean cut: Make a clean cut right below a node with your scissors or shears. Make sure your instruments are clean to avoid spreading germs.
Step 2: Preparing the Cuttings
Now that you have your cuttings, it’s time to prepare them for propagation.
- Remove Lower Leaves: Remove the leaves from the base of each cutting. Leave at least two to three leaves on top, and make sure the lowest half of the stem is bare so it may fall directly into the water or soil.
- Optional Step – Allow Cuttings to Callous. While Wandering Jew cuttings are fairly tough, some gardeners allow the cut ends to dry and grow a callous for a day or two before immersing them in water or soil to lessen the chance of rot.
Step 3: Rooting in Water vs. Soil
There are two main ways to root Wandering Jew cuttings: in water or directly in the soil. Here’s a quick look at both methods:
Rooting Wandering Jew Plant in Water
Water propagation is a popular method since it is straightforward and allows you to see the roots develop!
- Place the cutting in water. Place the cut end in a jar or tumbler of water, making sure the nodes are immersed. Keep the leaves out of the water to avoid rotting.
- Change the water on a regular basis. Change the water every 2-3 days to keep it clean and oxygenated.
- Wait for the roots to grow. In approximately 1-2 weeks, roots should start to develop. When the roots reach a couple of inches long, your cutting is ready to be put in the soil.
Also read: The Vertical Hydroponic Garden Revolution in Commercial Farming
Rooting Wandering Jew Plant Directly in Soil
If you choose, Wandering Jew cuttings can be rooted immediately in potting soil.
- Prepare a small pot of soil: Select a well-draining potting mix, preferably one intended for indoor plants.
- Insert the Cutting: Create a tiny hole in the dirt and insert the cutting, making sure the nodes are covered with soil.
- Water Lightly: Water the soil gently to settle it around the cutting, but do not overwater it, as a Wandering Jew plant appreciates damp (but not drenched) soil.
- Place in a bright location: Choose a location with strong, indirect sunlight to offer the cutting the best opportunity for growing roots.
Step 4: Transplanting the Rooted Cutting
Once your cutting has produced strong roots, whether in water or soil, it’s time to move it to a more permanent container.
- Choose a pot with drainage: A tiny container with drainage holes is required to avoid waterlogging.
- Fill with potting soil: Use a nutrient-dense, well-drained soil mixture. Fill the pot approximately two-thirds full.
- Place the cutting into the soil: Place the cutting in the container and add extra dirt around it, pressing lightly to secure.
- Water the new plant: Give the soil a gentle watering to let it settle, and then water as needed when the top inch seems dry.
Caring for Your New Wandering Jew Plant
Once your new plant is established, you will want to maintain it healthy and thriving. Here are some brief pointers on caring for a Wandering Jew plant:
- Bright, indirect sunlight is best. Avoid direct sunshine, since it might burn the foliage.
- Keep the soil slightly damp, but not saturated. Water whenever the top inch of soil seems dry.
- Wandering Jew plants need humidity, therefore they will benefit from periodic misting, especially in arid locations.
- To promote luxuriant growth, use a balanced, water-soluble fertilizer once a month throughout the growing season (spring and summer).
Common Problems & Troubleshooting
Even though Wandering Jew plants are resilient, you may encounter a few issues. Here are some common problems and how to fix them:
- Leggy Growth: This can happen if the plant doesn’t get enough light. Move it to a brighter location or consider pruning to encourage bushier growth.
- Yellow Leaves: Overwatering is often the culprit. Allow the soil to dry out a bit more between waterings.
- Browning Tips: This could be a sign of low humidity. Mist the plant or place it near a humidifier.
Propagation Tips & Tricks
To make the propagation process as smooth as possible, here are a few extra tips:
- Propagate in Spring or Summer: Cuttings tend to root faster during the growing season.
- Try Multiple Cuttings: Wandering Jew plants are quick growers, so propagate several cuttings together to create a fuller plant.
- Rotate the Pot: Give your plant even light exposure to prevent leaning or uneven growth.
Conclusion
Propagating a Wandering Jew plant from cuttings is an easy and gratifying method to grow your plant collection. With a little preparation and care, you’ll have lovely new plants in no time, ready to bring color and vitality into your home or share with friends. So, take those scissors and enjoy the process of promoting new growth!


